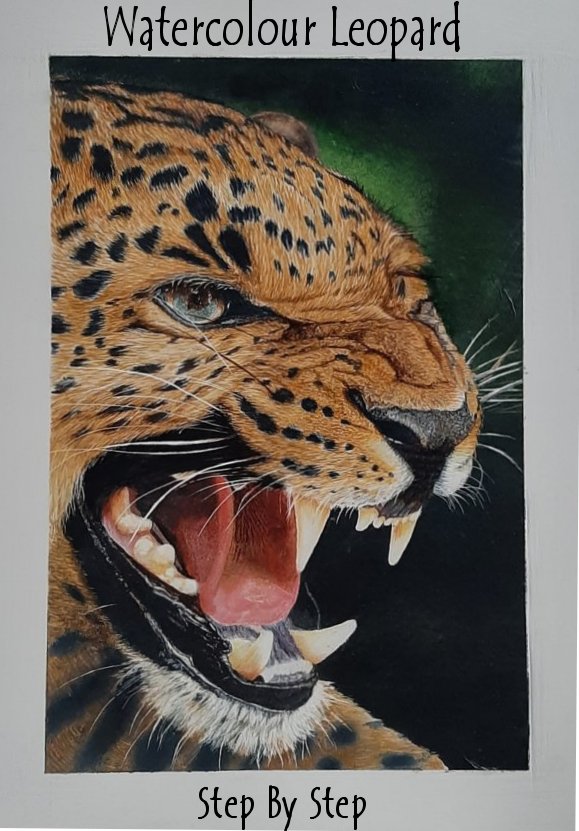
First a small disclaimer, I am not a professional artist or even proficient with watercolours , (this is my third watercolour painting), however I do have about 8 years’ experience in other media such as Oils, Pastels, Coloured Pencil, Pyrography and Airbrush. As a result the methods and techniques I am using here will be based on my experience and not necessarily the ‘correct’ way to paint watercolour .
Colours Used: Bacground: Winsor Green, Perylene Green, Sap Green, Lemon Yellow. |
|
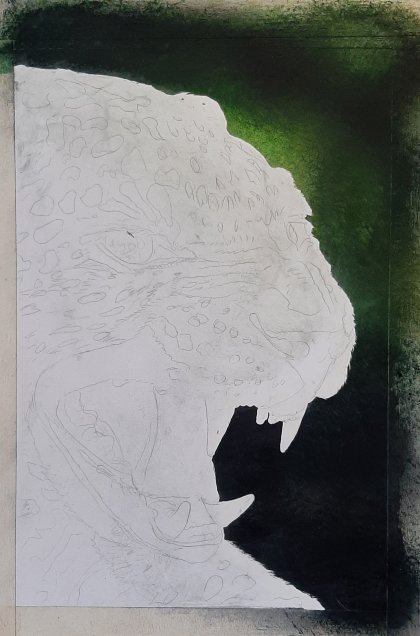 |
Step 1
|
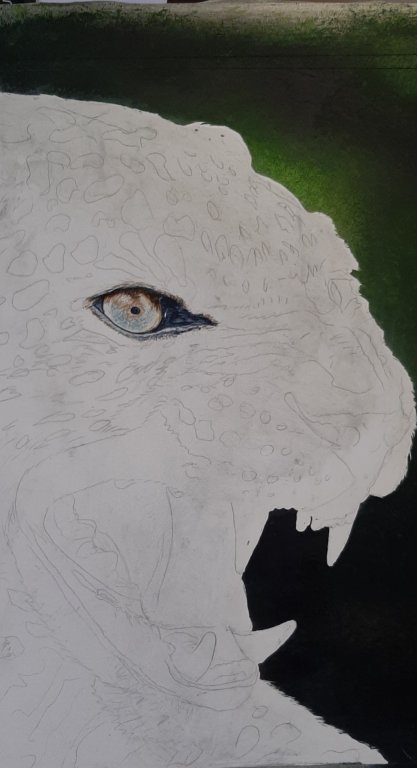 |
Step 2
|
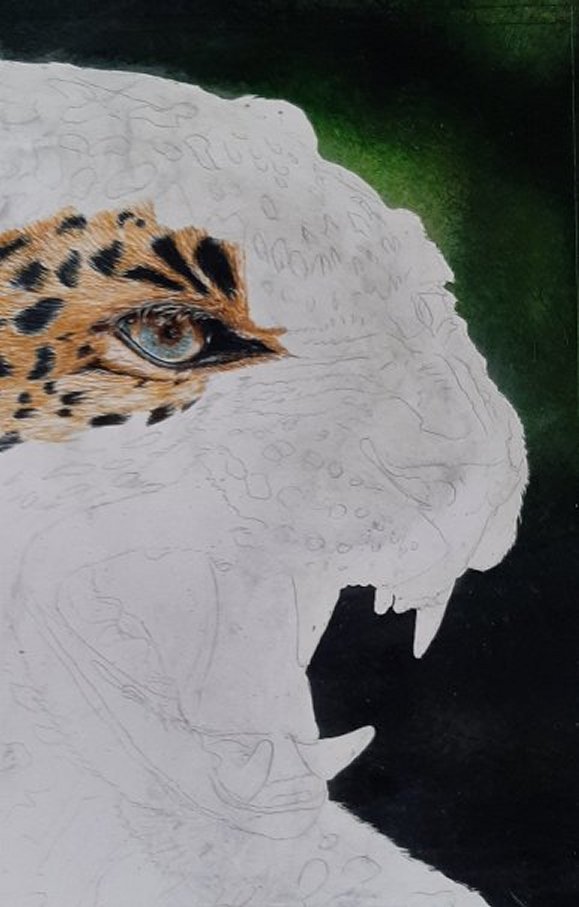 |
Step 3
|
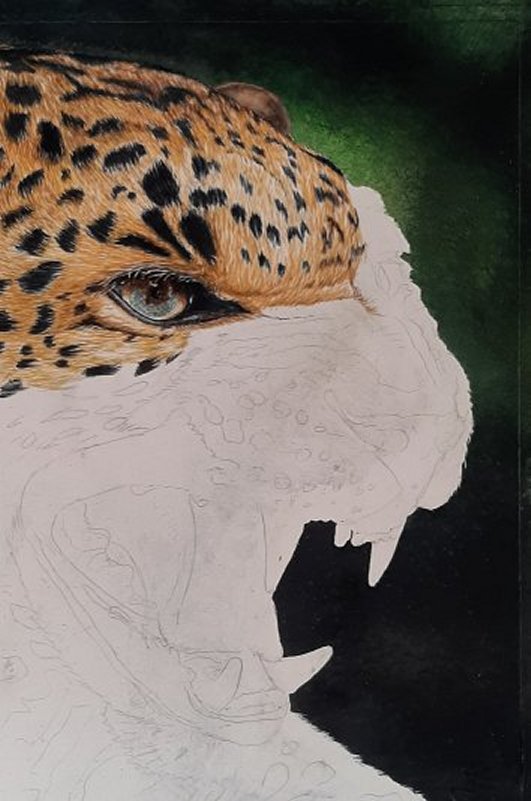 |
Step 4
|
 |
Step 5
|
 |
Step 6
|
 |
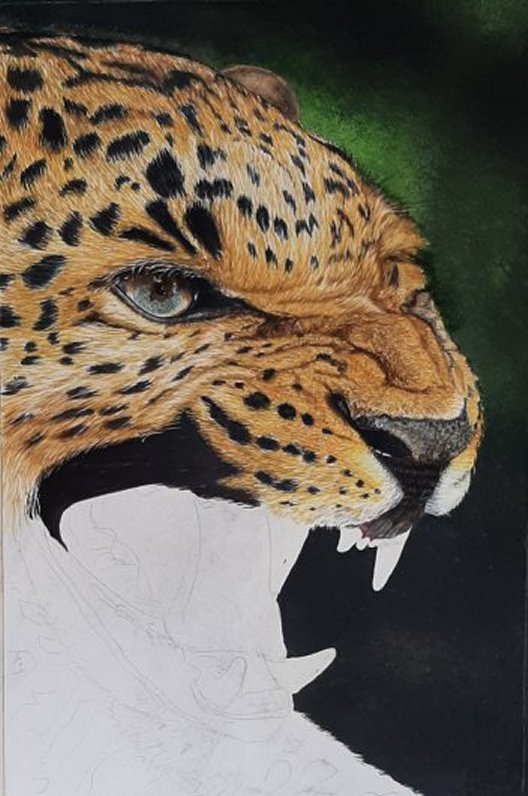
Step 7 Repeat for another layer |
 |
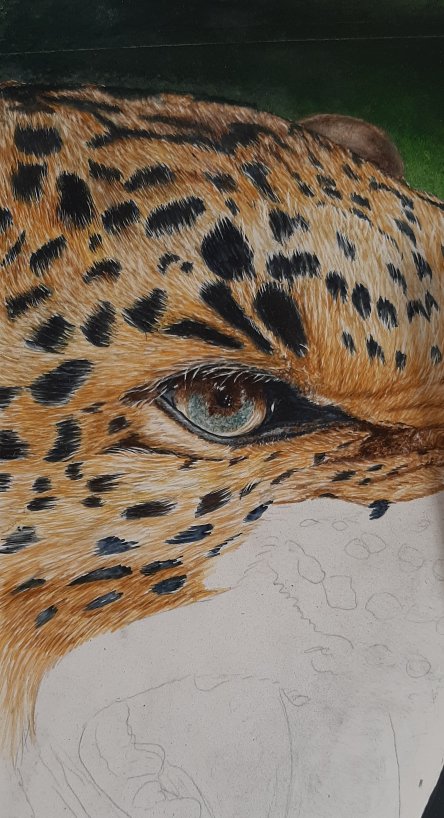
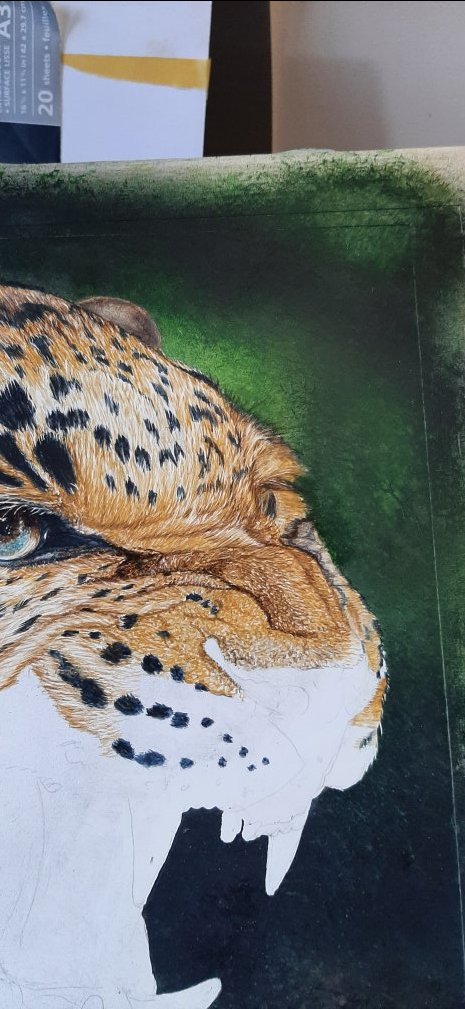
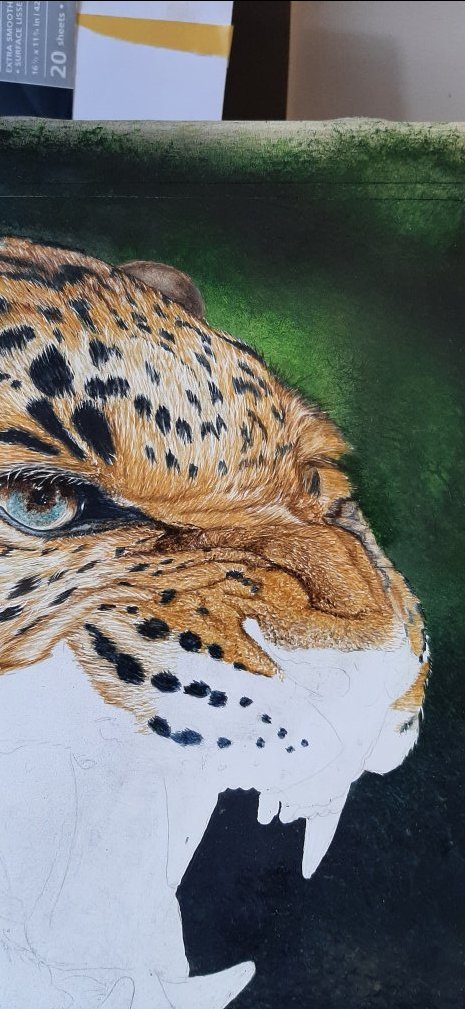
Step 8 Now I add in highlights using a hobby knife to scratch away the paint, another tool quite popular in the coloured pencil community is the ceramic blade type knife called the ‘Slice tool’ , of course you can use anything which will scratch the surface. https://www.sliceproducts.com/en-gb
|
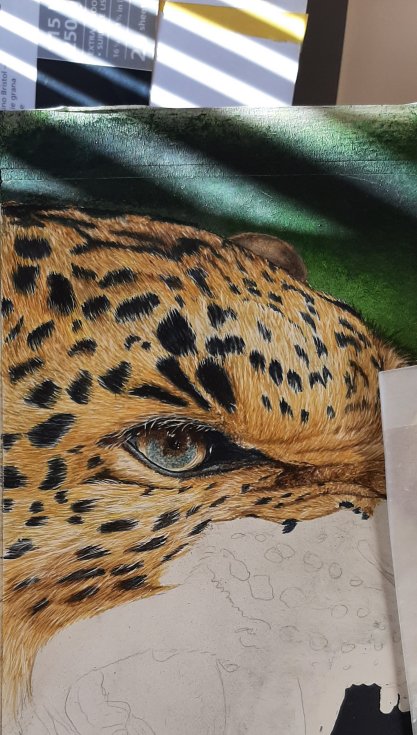 |
Step 9 Finally I go over the highlights with a light wash where required to ‘knock back’ the intensity of the highlight and blend into the surrounding areas. As I tend do build up my paintings in sections I will need to go over the whole painting at the end with glazing to bring everything together and adjust colours and shadows. |
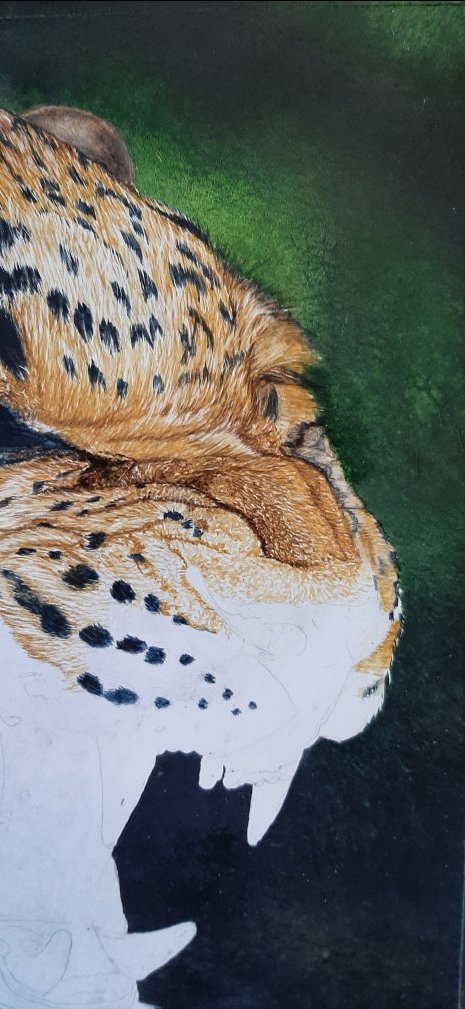
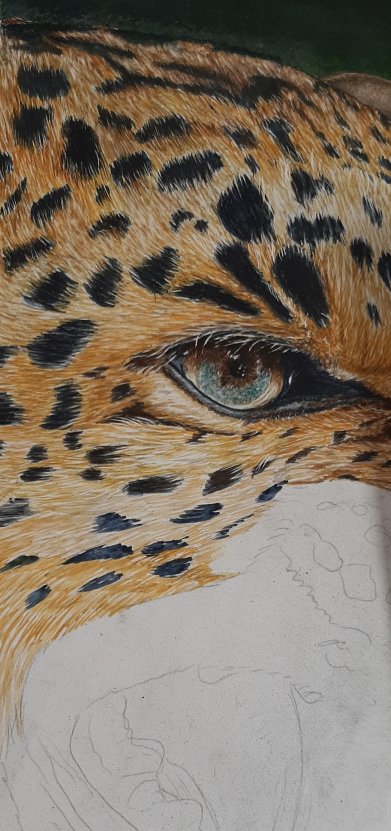
Muzzle fur
The fur around the bridge of the nose an general muzzle area tends to be very short ‘tufts’ of fur to try and simulate this type of fur I start off with a light layer (yellow ochre), very small brush strokes which blend into small irregular tufts by dabbing with the very tip of the brush.
Next I repeat with a little burnt umbra added increasing the concentration of ‘dabs’ in the shadow area’s.
Finally another layer but this time with a little cadmium orange added.
Nose
For the nose I started with a light layer of paynes grey , then built up the textures with a mix of burnt umba and a little paynes grey by again using a ‘dabbing’ motion with the very tip of my 00 brush. When I was happy everything was dark enough (about 3 layers), I enhanced the textures by using the dabbing motion with plain water on the brush and lifting off.
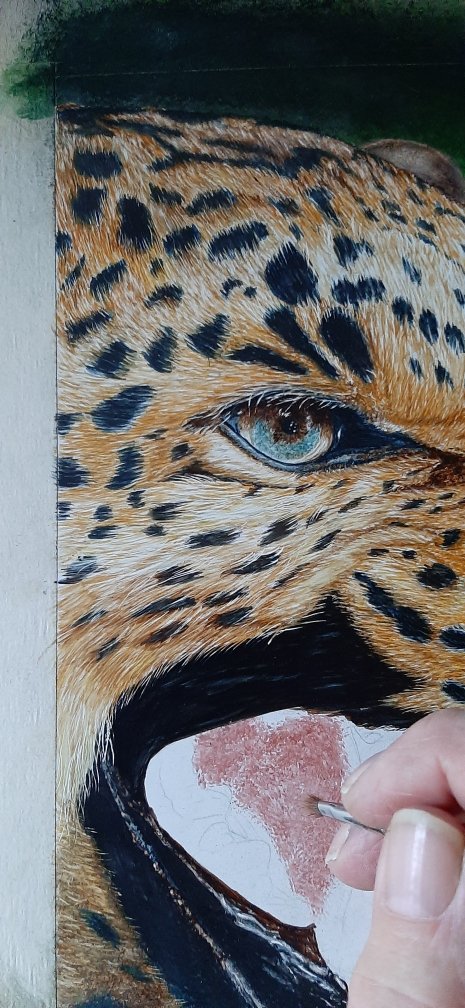
Tongue
Looking at the reference I could see the overall texture of the tongue and decided the best way to try and reproduce this was to use a stippling motion with a small short brush, after mixing up a mixture of cadmium red and violet I started..
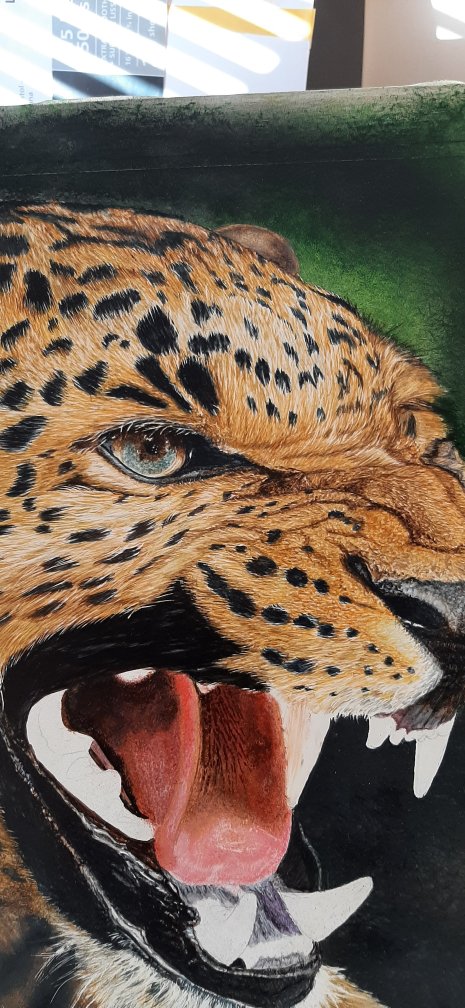
It took several layers before I was happy gradually increasing the strength of the mixture for the darker area’s and a bit of yellow ochre helped with the blending from ark to light area’s.
Teeth
The teeth turned out to be quite difficult, to get the smooth blend I had to very quickly use a dry brush to blend straight after applying the paint before it had time to dry properly , colours used were yellow ochre, lemon yellow and burnt umba.
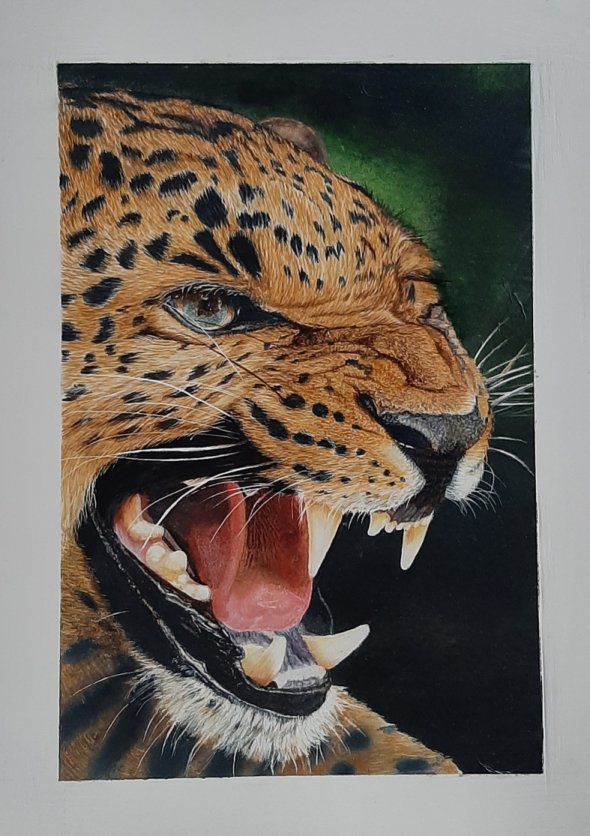
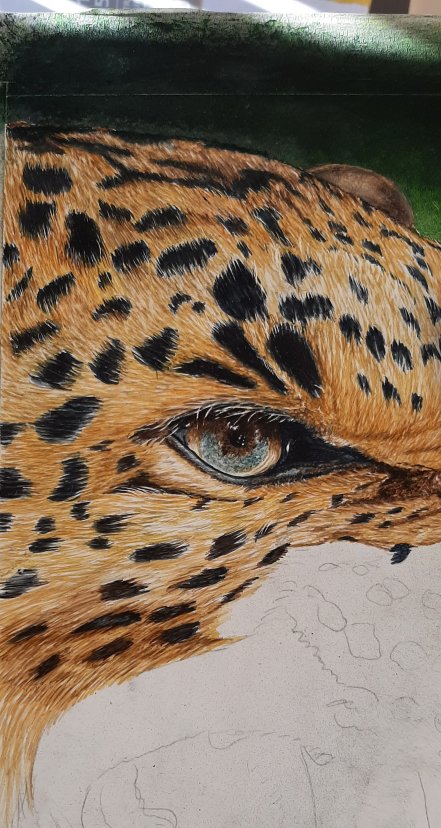
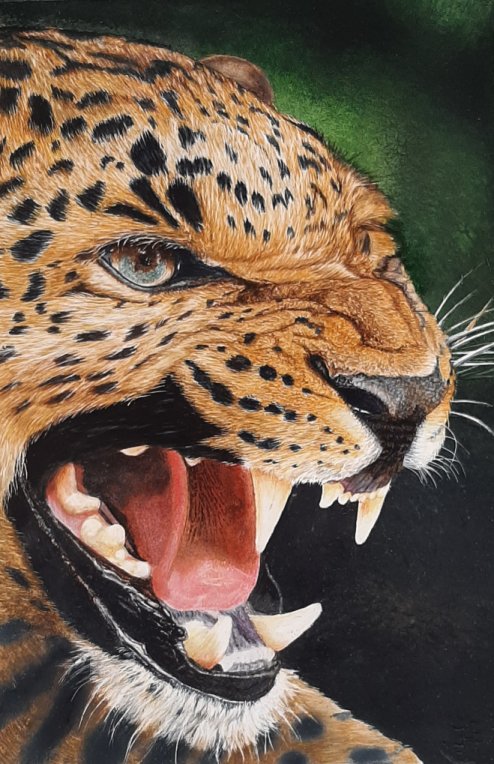
Final adjustments
The bottom area is slightly out of focus in the reference to try and get the same effect I went over the whole area with a light wash of Chinese white to smudge knock back the details to give a blurred look. The whiskers I scratched out with the hobby knife and then went over the whole painting applying light washes where required to bring together the different area’s and adjust shadows if required.
Conclusions:
I found the aquabord very difficult to work with to the extent I felt like I had lost some of the ‘freedom’ of watercolour painting mainly due to the surface not being very absorbent at all so blending and washes were very difficult indeed, even adding layers I needed to be careful not to lift the previous layer. I do like the vibrancy as the paint doesn’t fade when dry probably because the paint is just sitting on the surface and It is also very easy to create highlights. I will now just spray with gloss varnish and frame, no need for glass.
This was an interesting test as part of my watercolour journey but for now I am going back to paper, of course this is just my experience based on very limited water colour knowledge I am sure the professional s out there can work a lot better with this type of surface, perhaps when I am more experienced I will try Aquabord again.